Attachments
![]()
To attach an external file to Workflow, click the paperclip icon (above) at the top of the checklist or select the Attachments option from the right-click menu.
Purpose
The Attachments option allows you to attach additional files to an action.
The attachments are stored in the project folder, in a sub-folder of your choice and attached to the action currently selected.
Attaching a file also indexes it within the workflow system, making it easier to find at a later date. All attachments are associated with the project and allocated a date attached and description.
Files which exist within the project folder but which are not attached will be available from within Windows Explorer but not within the Workflow search facility. Wherever possible you should attach files instead of just copying to the project folder. It is for this reason that it is recommended that the edit access permission is deactivated on the access right ‘Access project folder in web’ when workflow is enabled.
Operation
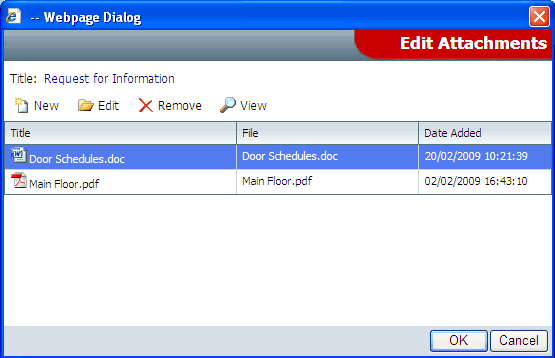
Clicking the Attachments option opens up an Attachments window containing a list of attachments.

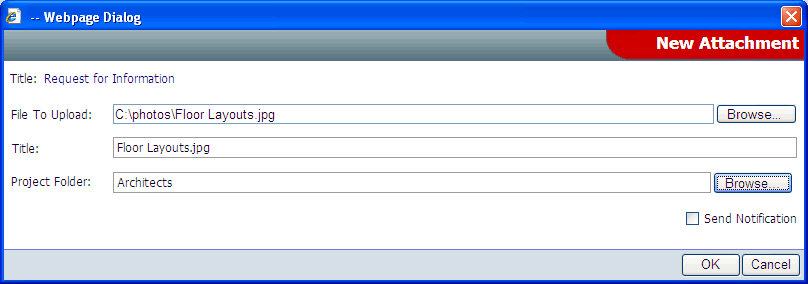
Clicking New adds a new attachment.

Checking the Send Notification checkbox will provide a second notification window allowing an email notification to be sent.
For more information on sending notifications, see the Send Notification topic.
File to upload |
The location of the file to be attached. If this location is within the project folder, then the file will just be indexed within Workflow. (attached to the project and allocated a title). If this location is outside the project folder, then the file will be copied to the project folder, under a sub folder of your choice. |
Title |
This should be a meaningful description of the file. |
Location |
A sub folder into which you wish to store the file. |